
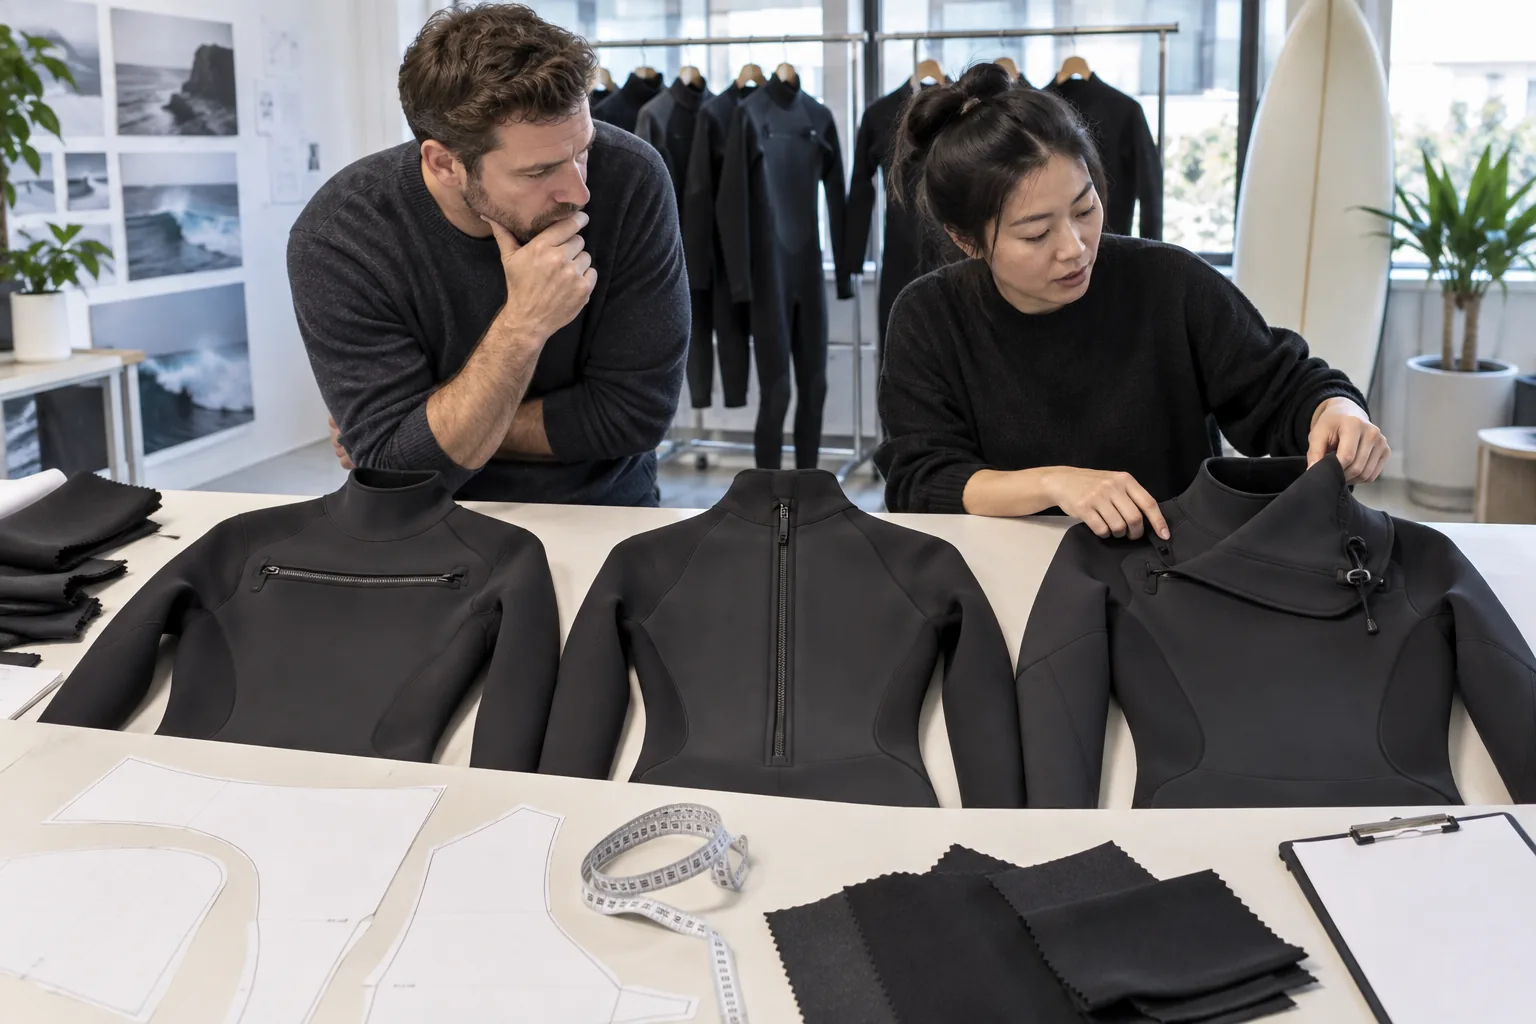
Short answer: In a chest zip vs back zip wetsuit comparison, no entry system is automatically best. A short horizontal chest zip can reduce the rigid zipper length across the back and support a flexible upper-body layout, but the opening and overlap must still allow practical donning. A long back zip normally creates a larger, easier-to-understand opening, although the zipper, neck closure and internal barrier must be engineered as one system. A zipless entry removes the main zipper but depends heavily on stretch, overlap geometry, cord or lock control, pattern fit and careful user handling. Select the system by product use, material thickness and stretch, target user, mobility, convenience, water-entry-control objective, serviceability and price—not by the marketing name alone.
INSEAKU develops and manufactures chest-zip, back-zip and zipless wetsuits for surf, diving, freediving, children’s, rental and other water-sports programs. Project-specific options can include several chest-entry constructions, vertical front zips, different zipper makes and models, pull cords, hook-and-loop neck tabs, overlapping panels, anti-flush barriers, drain holes, neck seals, slider guards, cord locks and reinforced zipper ends. Every option remains subject to an approved specification, sample validation, component availability and the intended quality plan.
This guide is for brands, importers, retailers, dive businesses and product teams comparing an OEM, ODM or private-label program. If you have not yet selected a manufacturing route, read our OEM vs ODM wetsuit guide. If you are still qualifying suppliers, use the 12-point wetsuit factory audit scorecard first.
Chest zip vs back zip vs zipless wetsuits: quick comparison
The comparison below is a starting framework, not a substitute for a sample. Material stretch, foam thickness, torso proportions, collar geometry, seam placement and user technique can change the result. Published consumer guidance from established wetsuit brands also describes these trade-offs in brand-specific terms, so buyers should translate general expectations into measurable project requirements.
| Buyer question | Chest zip | Back zip | Zipless |
|---|---|---|---|
| Opening location | Usually a short horizontal or angled opening across the upper chest | Usually a longer vertical opening down the upper or mid back | Usually an overlapping upper-torso entry without a main zipper |
| Donning concept | Enter through the neck/shoulder opening, position the overlap, then close the zipper | Open the back widely, step in, pull the suit up and close with the pull cord or assistance | Stretch through the opening, settle the overlap and secure any drawcord or lock |
| Mobility consideration | Shorter rigid zipper length may support a flexible back layout; the chest panel still needs correct stretch and ease | The longer back zipper can influence back flex and panel layout; the effect depends on design and zipper | No main zipper, but entry-panel tension, overlap and fit can still restrict movement if poorly engineered |
| Water-entry control | Depends on fit, overlap, neck seal, zipper, barrier, drain holes and seam construction | Depends on fit, collar, zipper, internal flap or barrier, zipper ends and neck closure | Depends on fit, stretch, overlap coverage, neck seal, lock or cord tension and drainage |
| User convenience | Moderate; entry size and shoulder mobility require sample confirmation | Often the most familiar and accessible, subject to body proportions and pull arrangement | Can require more technique and careful handling, especially with thicker or less-stretch materials |
| Serviceability | Zipper and lock can be specified and replaced according to construction access | Longer zipper is prominent and identifiable, but replacement complexity remains construction dependent | Fewer main-zipper components; cord, lock, overlap and elastic recovery still require inspection |
| Cost drivers | Zipper, overlap panels, barriers, drainage, reinforcements, labor and QC | Long zipper, pull, neck tab, barrier, reinforcements, labor and QC | High-stretch materials, complex entry panels, cord/lock hardware, labor and fit validation |
| What must be approved | Entry-system drawing, components, opening dimensions, panel pattern, seals, barriers, drainage, reinforcements, operation, fit, appearance and sample test results | ||
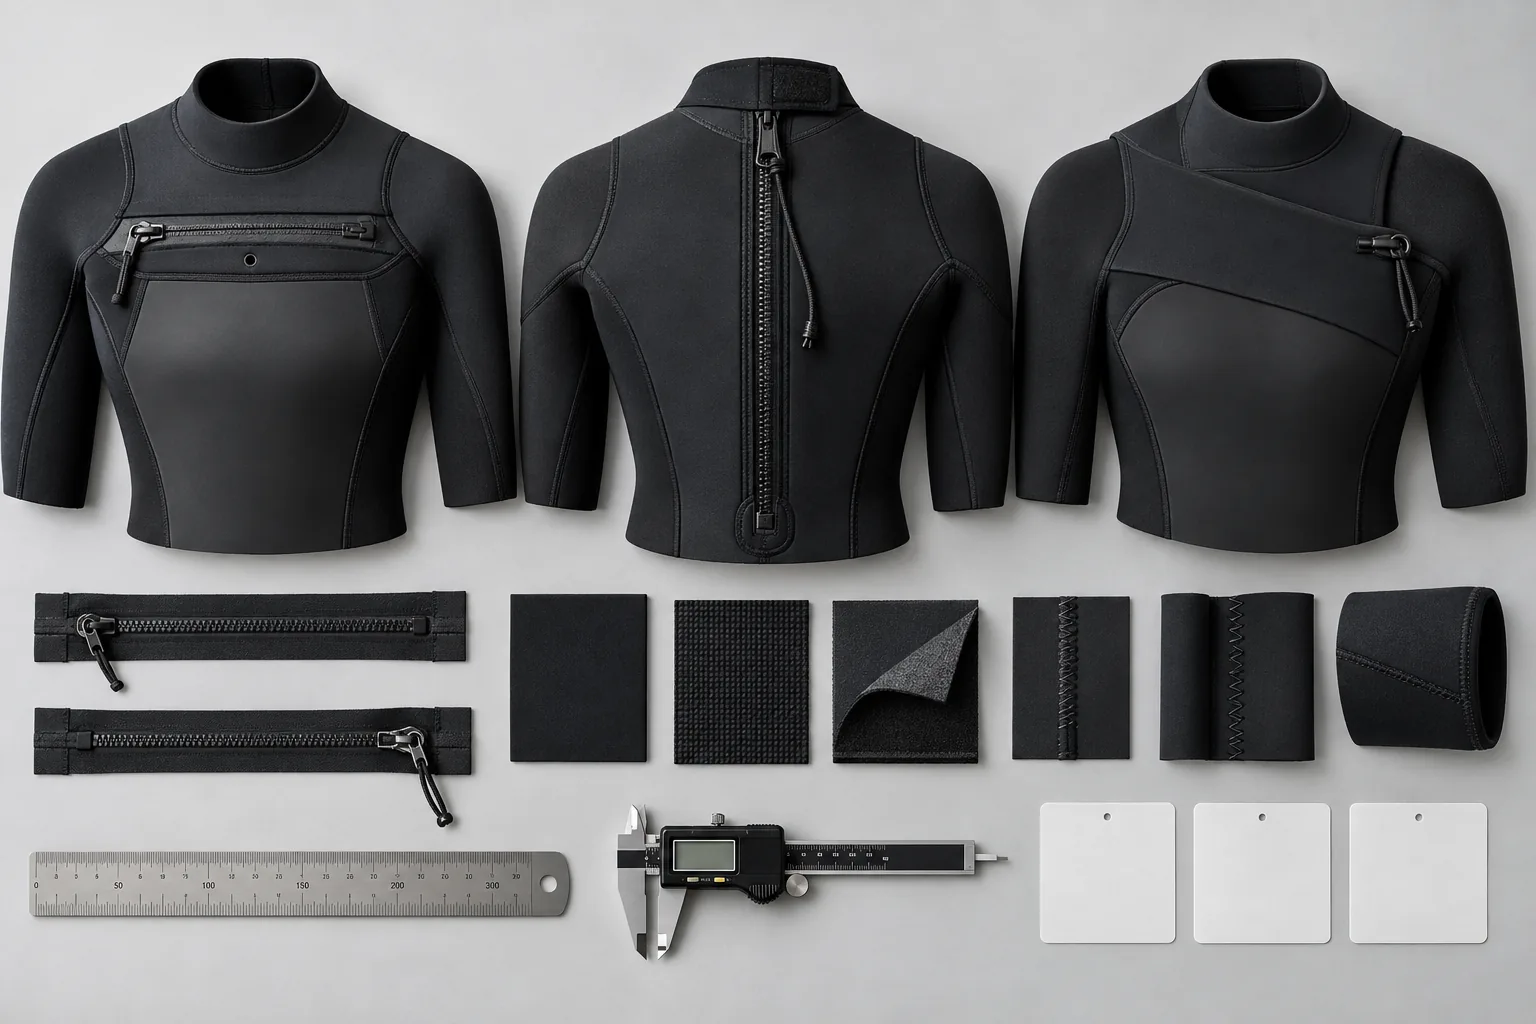
What do chest zip, back zip, zipless and front zip mean?
A category label identifies the general entry direction, not a complete construction. Two chest-zip wetsuits can use different zipper orientations, opening widths, floating panels, shoulder-entry shapes, barriers, drain-hole layouts and neck seals. The same applies to back-zip and zipless products. Your tech pack should therefore show the physical architecture rather than relying on one phrase.
When planning several models, use this private-label surf wetsuit range planning guide to connect the entry system to each model’s customer role, material specification and sample evidence.
Chest zip
A chest-zip wetsuit normally uses a relatively short zipper across the upper front torso. The wearer enters through the upper opening, pulls the entry panel over the head or shoulder area, then closes the zipper. INSEAKU can develop several chest-entry structures according to the intended pattern, material and user. Published examples from wetsuit brands often combine this layout with floating panels, barriers or drain openings, but those features must be specified individually.
Back zip
A back-zip wetsuit normally uses a long vertical zipper at the back. A pull cord may help the wearer close it. The system can also include a neck hook-and-loop tab, internal flap or barrier, zipper-end guards and reinforcement. A long opening may make the suit easier to enter for many users, but the actual result depends on torso fit, zipper length, collar opening and material stretch.
Zipless
A zipless or zipperless wetsuit normally uses stretch and overlapping panels to create the entry opening. A drawcord, cord lock, tab or another retention method may control the opening. Removing the main zipper does not remove engineering work: overlap coverage, opening recovery, neck fit, shoulder ease, drain points and user handling become central acceptance criteria.
Vertical front zip
A vertical front zip runs up and down the front torso. INSEAKU can manufacture this construction as a project-specific option. It should not be confused with the common horizontal upper-chest entry. State the exact orientation, start and end positions, opening direction and internal barrier on the drawing.
How should a brand specify a chest-zip wetsuit?
A buyer assessing a chest zip wetsuit manufacturer should begin with the required user experience and work backward to the architecture. “Use a chest zip” is incomplete. At minimum, the development team needs an entry drawing, finished opening dimensions, zipper identity, panel overlap, neck construction, barrier and drainage plan.
Define the opening and zipper
- Show whether the zipper is straight, curved or angled and whether the slider closes left-to-right or right-to-left.
- State the zipper brand, model, size, length, color and performance requirement. INSEAKU can source YKK and other project-approved options subject to availability.
- Dimension the finished opening, zipper ends and distance from the neck and armhole reference points.
- Specify slider guards, zipper garages, stop reinforcement, pull type and any anti-snag detail.
- Show the entry panel’s attachment, overlap direction, opening edge and retention method.
Define the barrier, seal and drainage
An internal or floating barrier can help manage water movement behind the opening. Drain holes can allow trapped water to exit, while a neck seal and correct torso fit help control flushing. These details work together. A barrier without drainage may retain water; an opening with insufficient overlap may expose the inner entry under movement; excessive tension may make donning difficult or distort the collar.
Do not approve the zipper in isolation
The chest entry should be evaluated while worn. Confirm that the wearer can enter without overstretching the foam or seams, that the overlap remains positioned through shoulder movement, that the zipper closes smoothly and that the ends do not create pressure points. The visual line must also meet the approved artwork and panel layout.
How should a brand specify a back-zip wetsuit?
A buyer evaluating a back zip wetsuit manufacturer should treat the zipper, pull system, collar and internal flap as one assembly. The long rear opening can support straightforward donning, which may matter for rentals, training users, children or products prioritizing convenience. It can also introduce a long component and reinforcement zone across a moving part of the body, so pattern and sample checks remain essential.
Specify the complete back-entry assembly
- Zipper brand, model, gauge, length, color, slider count, opening direction and end positions
- Pull-cord material, length, attachment and storage method
- Neck hook-and-loop tab geometry, hook placement and skin-contact protection
- Internal flap or barrier width, material, attachment and finished edges
- Top and bottom zipper-stop reinforcement and any slider guards
- Collar height, circumference, overlap, seal surface and adjustment range
Check access without sacrificing control
A larger opening can simplify entry, but the pattern must close around the wearer without excessive folds, neck gaps or strain at the zipper ends. For a rental program, repeat the donning and zipper-operation test with representative users and record snagging or misuse risks. Our rental wetsuit specification guide explains how entry convenience fits into a broader size, durability, care and replacement plan.
How should a brand specify a zipless wetsuit?
When qualifying a zipless wetsuit manufacturer, ask how the opening recovers after repeated stretch. The wearer must be able to pass through the entry, yet the overlap, neck and retention system must return to the intended position. Material elasticity alone is not enough; panel shape, seam direction, reinforcement and opening-edge construction determine how the system behaves.
Map the overlap and retention system
Show each entry layer in the tech pack. Dimension the overlap in the worn position and identify which panel sits above or below the other. Specify drawcord material, routing, lock type, anchor point, pull length, protective cover and drainage. If a tab or another lock is used, show its closed and open positions.
Validate handling and recovery
During sampling, record how the suit is donned and removed, whether users pull on vulnerable edges, whether the opening returns to shape and whether the cord or lock creates a local pressure point. Thicker or lower-stretch materials may need a different opening and panel solution than a thinner high-stretch suit. A marketing preference for “no zipper” should never override the actual user test.
How should a brand choose between chest zip, back zip and zipless?
Start with the intended user and environment, not a copied competitor feature. The best decision is the one that satisfies the written requirements with repeatable sample evidence.
| Project priority | Potential starting direction | Questions to answer before approval |
|---|---|---|
| Familiar access and a large opening | Review a back-zip concept first | Can representative users reach and operate it? Does the collar close correctly? Is the barrier effective for the specified test? |
| Shorter rigid zipper length and upper-back flexibility | Review a chest-zip concept first | Is the opening large enough? Does the overlap stay seated? Are the zipper ends, drain holes and barrier correctly placed? |
| No main zipper and a streamlined upper body | Review a zipless concept first | Can the user enter without damaging the suit? Does the opening recover? Does the lock remain secure without discomfort? |
| Frequent use by many users | Compare access, misuse tolerance and repairability; do not assume one category | How many don/doff cycles are expected? Who maintains the product? Which components can be replaced? |
| Special diving, freediving or open-cell interior | Develop around the full product and donning method | How will the lining, seals, thickness and entry interact? Review our open-cell vs lined wetsuit guide. |
| Children’s or entry-level product | Prioritize safe, understandable operation and verified size fit | Can the target user enter and exit with the intended assistance? Are cords, tabs and zipper ends appropriate? |
O’Neill’s published consumer comparison, for example, describes a back zip as easier to enter, a chest zip as using a shorter opening with different flexibility and a zipless system as relying on stretch and closures. Rip Curl’s published zip-free instructions show how an overlap panel and adjustable cord form part of the donning sequence. These are useful examples, but they describe those brands’ products. Your product must be approved against its own pattern, materials and tests.
How does the closure system affect pattern, panels and seams?
Changing the entry system after sampling is not a simple component substitution. It may change the pattern, panel count, seam placement, collar, shoulder ease, grading, reinforcement and assembly sequence. The wetsuit manufacturing process must translate those changes into controlled production documents.
Pattern and panel architecture
The entry opening removes or overlaps material in a high-movement zone. A chest entry may require a floating outer panel and a shaped inner opening. A back entry divides the rear panel and needs allowance around a long zipper. A zipless entry requires sufficient stretch and overlap while maintaining the intended neckline and shoulder mobility. Each arrangement should be graded across the size range rather than scaled blindly from one sample.
Seam placement and reinforcement
Zipper ends, cord anchors and opening corners concentrate load. Reinforcement must match the foam, lining, zipper tape and seam method. Seams near the opening should be positioned so the wearer does not repeatedly pull directly against a vulnerable junction. When water-entry control is important, specify whether joints are glued, blind stitched, flatlocked, taped or liquid sealed and how the closure area is tested. The GBS vs flatlock seam guide provides the construction context.
Material stretch and thickness
A closure developed in one material cannot automatically be transferred to another. Thickness, modulus, stretch direction, surface lining and recovery can change entry force, neck behavior and panel alignment. Use the approved material specification and stretch orientation on the pattern. Our wetsuit material selection guide explains why the complete laminate matters.
When thickness changes, recheck the entry opening, overlap, zipper curve, seam bulk, shoulder mobility and pattern. The wetsuit thickness guide for 3 mm, 5 mm, 7 mm and zoned constructions explains how to control these connected decisions.
What closure details belong in a wetsuit tech pack?
The closure page in the tech pack should be detailed enough for a pattern maker, sample technician, buyer and inspector to identify the same product. Use callouts, dimensions, cross-sections and a bill of materials. The downloadable worksheet below can accompany your wetsuit tech pack and RFQ checklist.
- System and orientation: chest zip, back zip, zipless, vertical front zip or approved hybrid; show open and closed views.
- Zipper or lock: brand, model, gauge, length, color, slider, stops, opening direction, pull, cord, lock and supplier reference.
- Opening dimensions: finished length, width, position and measurement method by size.
- Panel map: panel names, overlap direction, stretch direction, foam/lining schedule and pattern-version code.
- Barrier and seal: internal flap, floating barrier, neck seal, gasket, slider guard and skin-contact surfaces.
- Drainage: hole count, diameter, reinforcement, position and intended flow path.
- Seams and reinforcement: glue, stitching, tape or liquid seal, zipper-end patches, opening-edge finish and cord anchors.
- Performance and use: intended activity, water temperature or environment, user profile, mobility and water-entry-control objective.
- Sample tests: donning, doffing, seal contact, mobility, opening recovery, operation, snagging, irritation, flushing and project-specific tests.
- Approval: sample ID, specification revision, comments, authorized approver and dated written release.
Download the Wetsuit Closure Specification and Sample Test Worksheet (Excel)
The workbook includes a closure specification, comparison/decision page, sample-test log and QC plan. Replace the example entries with your project data and attach supporting drawings. The worksheet is a planning aid; the signed specification, sealed sample and purchase documents remain controlling.
How should the closure system be tested during sampling?
A sample is not approved because the zipper opens once or because the product looks correct on a table. Test the complete entry on representative bodies and record the method, result, evidence and required correction. INSEAKU can use fixed fit models when the project requires a wear review; the exact protocol should be agreed in advance.
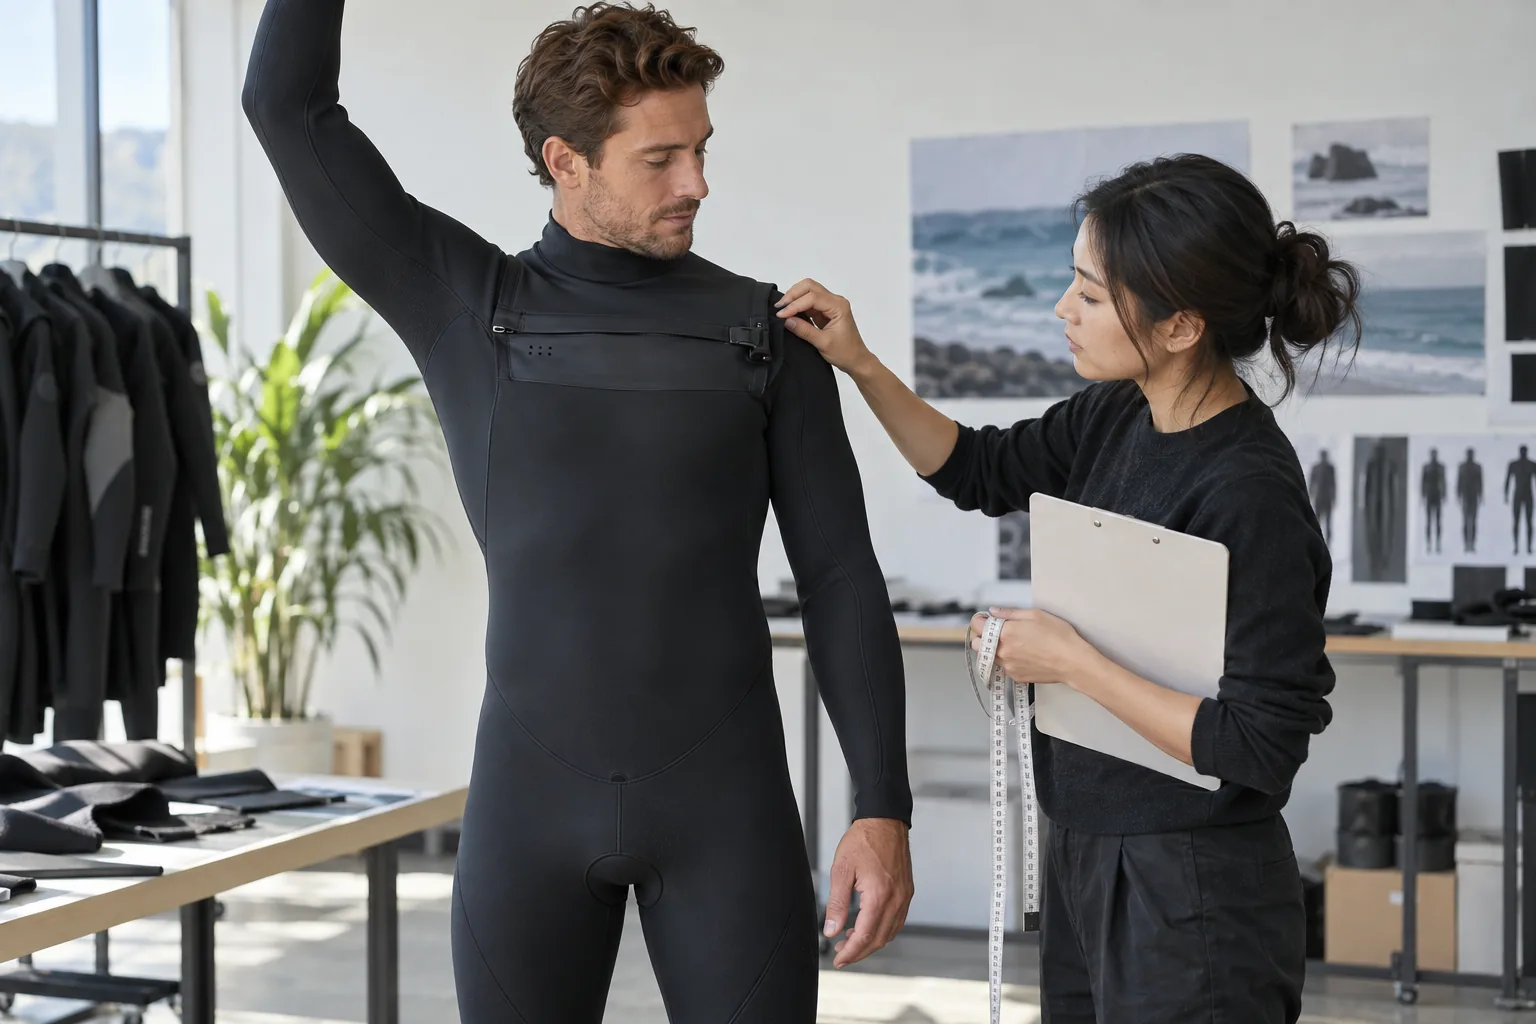
1. Donning and doffing
Record the user, size, donning method, assistance allowed, time, difficult steps and the areas pulled during entry. Check whether the opening is large enough without excessive force and whether repeated handling damages foam, lining, seam ends, zipper tape or cord anchors.
2. Neck seal and entry-panel position
Inspect neck contact, gaps, folds, excessive pressure and skin irritation. Confirm that the chest flap, back barrier or zipless overlap sits in the intended order. Check whether movement exposes the inner opening or displaces the seal.
3. Shoulder and torso mobility
Use movements relevant to the sport: overhead reach, paddling posture, arm rotation, bending and equipment interaction. Compare left and right movement, visible strain and wearer feedback. A closure should not be approved based only on standing posture.
4. Operation, snagging and comfort
Open and close the zipper, cord or lock repeatedly. Record slider force, fabric or barrier snagging, lock security, loose pull hazards, end-stop irritation and whether the user can operate it as intended. Follow the selected component supplier’s operating and care instructions.
5. Opening recovery and water-entry observations
After donning cycles, measure whether the opening and overlap recover to the approved position. For an agreed in-water or simulated test, record the size, user, activity, duration, water conditions, observed flushing location and acceptance rule. Do not replace a defined test with a vague statement such as “minimal water.”
The broader wetsuit fit-testing protocol explains how to separate measurement, mobility, comfort and water-entry findings before approving a sealed sample.
What should wetsuit closure quality control include?
Quality control should connect incoming component identity to in-process workmanship and final product operation. Inspection frequency, sample size, test conditions and acceptance limits follow the approved quality plan. Our wetsuit quality-control checklist provides the full-garment framework.
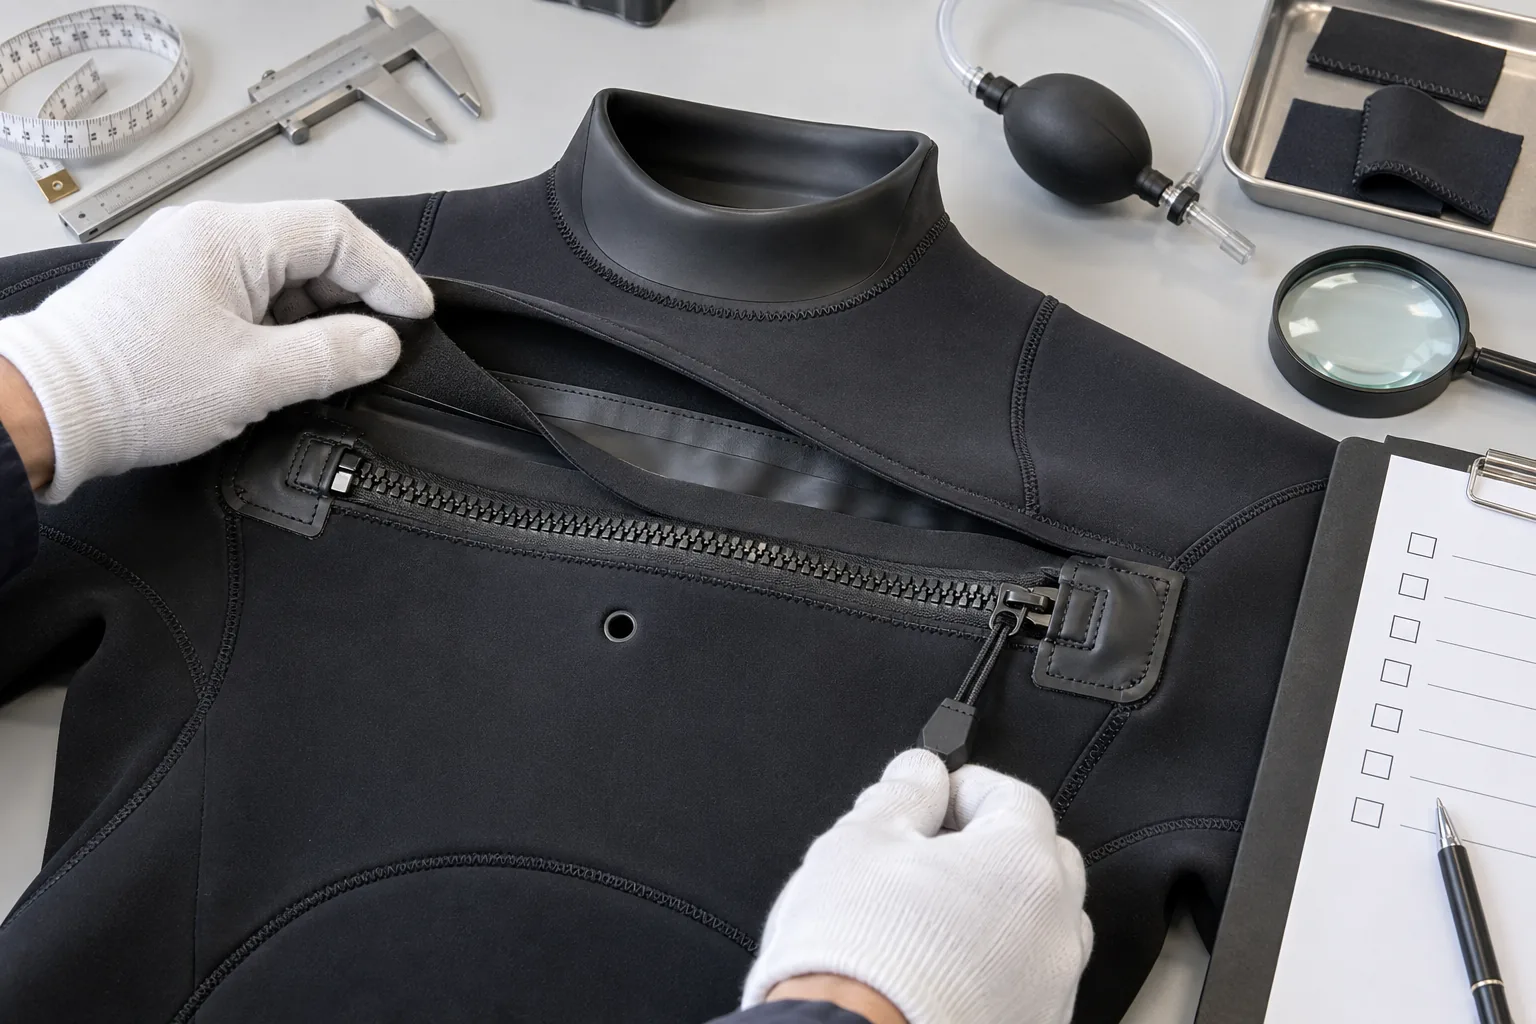
Incoming components
- Match zipper brand, model, gauge, length, color, slider and quantity to the approved bill of materials.
- Check cord, lock, hook-and-loop, reinforcement, tape and barrier materials against references.
- Review visible damage, contamination, deformation and supplier documentation where required.
- Segregate unidentified or nonconforming components before cutting and assembly.
In-process construction
- Verify zipper orientation, opening direction, position, alignment and end reinforcement.
- Check barrier and overlap dimensions, attachment order and finished edges.
- Confirm drain-hole size, count, reinforcement and position.
- Inspect glue coverage, stitch formation, tape or liquid seal and any skipped or damaged areas.
- Operate the slider, pull cord or lock before the assembly becomes difficult to access.
Final inspection and project-specific tests
- Compare appearance, measurements and closure details to the approved sealed sample and specification.
- Run zipper or lock operation checks and inspect snagging, stops, guards, tabs and pull retention.
- Check neck seal, opening recovery, overlap coverage and symmetry.
- Conduct localized pressure, air, bubble or other agreed tests when required by the customer quality plan.
- Record defects, rework, retest and final release under the defined inspection plan.
YKK’s official technical support notes that water-protective zipper performance differs by zipper type and size, and its installation guidance emphasizes compatible materials, reinforcement and correct handling. Therefore, do not copy a test pressure or performance claim from another zipper. Specify the selected component and test the finished assembly under the agreed method.
How do entry systems affect MOQ, cost, lead time and reorders?
MOQ
INSEAKU’s normal starting MOQ is 50 pieces per style and color. Sizes may be mixed within that style/color quantity. The closure category itself does not add a separate MOQ. However, a specified zipper brand, model, length, color, lock or other supplier component may carry its own procurement minimum or availability constraint. Confirm this before sample approval and bulk quotation.
Cost
There is no reliable universal ranking from cheapest to most expensive. Cost depends on the selected zipper or hardware, panel count, material consumption, pattern development, barriers, drainage, reinforcements, assembly operations, sample revisions, inspection and testing. Request a quotation against one frozen specification. Do not compare a basic back zip with a complex chest-entry or zipless system as if the entry label were the only difference.
Sample timing
INSEAKU sample development can start from approximately seven working days after materials and specifications are confirmed and payment is received. This is a starting timeline, not a guarantee for every project. A specified YKK zipper or other special component may require separate procurement and may prevent sample completion within seven working days. Complex patterns, multiple sizes, special materials, custom colors and revisions can also extend timing.
Bulk production and shipping
Bulk production begins only after the buyer has approved the sealed sample in writing, the specification is confirmed, the production order is in place and the required deposit has been received. Normal production is approximately 30 working days, but style, material, quantity and capacity determine the schedule stated in the written quotation. International transportation is separate from production lead time.
Reorders
A reorder can reuse the confirmed specification and pattern version, but component availability must be reconfirmed. Zipper manufacturers can change colors, models, lead times or minimums. Record approved alternatives and the process for buyer authorization; never substitute a zipper or lock silently.
For a fuller commercial framework, see our guide to wetsuit manufacturer MOQ, sample cost and production lead time.
What should buyers include in a closure-system RFQ?
Send the same controlled brief to each candidate so that construction and price are comparable. Include:
- Product category, intended use, target user and sales market
- Chest zip, back zip, zipless, vertical front zip or request for a documented recommendation
- Reference drawings, opening dimensions and required size range
- Material construction, thickness, lining and stretch direction
- Zipper brand/model/length/color or required performance and approved-equivalent rule
- Pull cord, lock, neck tab, guard, barrier, seal, drain and reinforcement details
- Seam construction around the entry and any tape or liquid-seal requirement
- Logo, print and panel artwork near the opening
- Donning, mobility, comfort, recovery and water-entry test requirements
- Incoming, in-process and final inspection plan
- Quantity by style, color and size; delivery window and destination
- Sample stages, approval authority and change-control process
If you do not have a finished entry design, state the priorities and constraints instead of asking for an undefined “best closure.” INSEAKU can recommend a project route and then document it for sample approval.
Buyer FAQs
Is a chest zip always warmer or more watertight than a back zip?
No. Thermal comfort and water entry depend on fit, pattern, material, thickness, seals, barriers, seams, activity and test conditions. Entry orientation alone does not prove either outcome.
Is a zipless wetsuit waterproof?
No wetsuit closure should be described as absolutely waterproof without a defined product and validated test. A zipless system is designed to help control water entry or flushing when combined with the correct fit, pattern and construction.
Which entry is easiest to put on?
A long back opening is often familiar and accessible, but body proportions, material stretch, zipper length and user ability matter. Chest-zip and zipless systems can also be practical when the opening and pattern are correctly developed. Test representative users.
Can INSEAKU make YKK zipper wetsuits?
Yes. As a project-specific YKK zipper wetsuit manufacturer, INSEAKU can source specified YKK models and other approved zipper options. Availability, color, length, supplier MOQ and procurement lead time must be confirmed for each project.
Can I use the same closure on surf, diving and freediving suits?
The same general category may be used, but the construction should be developed for the product’s material, thickness, activity, fit, user and performance requirements. Do not transfer a closure unchanged without sample validation.
Does changing from back zip to chest zip require a new sample?
Yes. The change can affect pattern pieces, opening dimensions, panels, seams, collar, shoulder ease, grading, components, price and assembly. It should be treated as a controlled development revision and sampled.
What is the MOQ for a custom closure?
INSEAKU’s normal starting MOQ is 50 pieces per style and color, with sizes mixable within that quantity. The closure does not automatically add another garment MOQ, but specified supplier components may have their own procurement minimums.
How should I approve the closure sample?
Approve the physical sample ID together with the matching specification revision, pattern version, material list, component list, measurements and recorded tests. State the authorized approver and approval date in writing. Any conditional approval should identify open items and how they will be closed before bulk release.
Turn the entry preference into a controlled specification
The commercial choice is not simply chest zip, back zip or zipless. The real deliverable is a repeatable entry assembly: correct pattern, named components, defined opening, barrier, seals, drainage, reinforcements, operation, sample evidence and inspection records. That is what allows a brand to compare quotations, approve a sample and protect the bulk order.
Send INSEAKU your product brief to request a closure-system review and custom wetsuit quotation. Include the intended use, target user, material/thickness, preferred entry, zipper or lock requirement, size range, quantity and launch timing. If the design is not fixed, identify your priorities so the development team can propose and document an appropriate route.
References and further reading
- O’Neill UK — Back zip, chest zip and zipless wetsuit comparison
- O’Neill UK — Published wetsuit entry and barrier examples
- Rip Curl — Zip-free wetsuit entry guide
- Quiksilver — Wetsuit selection and entry-system guidance
- YKK — AQUASEAL product and application information
- YKK — Water-protective zipper testing information
- YKK — AQUASEAL installation, operation and care guidance
Last reviewed: September 10, 2026. INSEAKU reviewed the manufacturing capabilities, entry-system options, standard garment MOQ, indicative sample timing, approval workflow and quality-control scope described in this article. Project-specific construction, component availability, performance requirements, tests, price and schedule remain subject to the approved specification, sealed sample, written quotation and purchase order.