
A life jacket zipper vs buckle comparison starts with their jobs: the zipper joins an opening, buckles connect straps, and adjusters change strap length. One vest can use all three. Choose a suitable model that the wearer can fasten completely and adjust comfortably. Hardware count alone does not tell you which vest fits better or provides the right protection.
Life jacket zipper vs buckle: compare the function

AI-generated illustration. Generic construction illustration; not a specification for the pictured INSEAKU models. [1–3] View full size
| Part | What it does | What to compare |
|---|---|---|
| Front zipper | Joins the front opening. | Can the wearer align, start and close it without trapping fabric? |
| Buckle and strap | Connects the strap; an integrated adjuster may also change its length. | Can the wearer engage it fully and identify every required fastening? |
| Side adjuster | Changes the effective length of a strap around the body. | Can the wearer reach it, tension it evenly and stow the loose end? |
Do not confuse side adjustment with side entry. Side entry describes where the garment opens. Side adjustment describes where you tighten it. Palm’s Centre Zip combines front entry with adjustable strapping; its Solo Vest uses side-entry buckles. These are different layouts, not a rule that every side-adjusting vest opens at the side. [2] [3]

Supplied INSEAKU catalog photograph, IN-V068 front; no AI edit recorded. Layout reference, not a test or label verification. View full size.

Supplied INSEAKU catalog photograph, IN-V058 back; no AI edit recorded. Layout reference, not a test or label verification. View full size.
The black and cyan INSEAKU vest visibly combines a centre-front zipper and two horizontal buckle straps. The rear view of the blue utility vest shows horizontal webbing and adjustment hardware. These photographs help identify parts; they do not establish the complete fastening sequence, adjustment limits, buckle strength or approval status. The images are independently scaled.
Settle intended use and product category before comparing the hardware. Our buoyancy aid versus life jacket guide covers that decision.
Which arrangement is easier to put on?
The easier system is the one your users can operate correctly in the clothing they will wear. Front access puts the fastening in front of the wearer. A side opening changes the reach and hand position. Either needs a try-on; the word “zip” or “buckle” does not settle it.
For a front zipper, check whether the wearer can see or feel the starting point, keep lining out of the chain and complete the travel. For buckle straps, check whether the matching halves are obvious, reachable and fully engaged. If gloves are part of the activity, include those gloves in the comparison.
A zipper with buckle straps means checking the complete system. Do not assume the buckles are optional because the zipper is closed. Obtain the model’s instructions and follow every required fastening step. NRS’s fitting guide explicitly treats entry closures and adjustment as parts of the same fitting process. [1]
Ask to see the garment open, then fully fastened and adjusted on the wearer. A photograph of the closed front cannot show which straps were loosened, disconnected or left unused.
Does more adjustment mean a wider size range?
No. More adjusters do not prove that one size fits more people. A strap may have travel left while the foam panels, armholes or shoulder position still fit poorly. Use the model’s size chart and labelled wearer limits, then check the actual fit over the intended clothing. NRS notes that sizing systems differ between manufacturers. [1]
For a procurement comparison, ask for two separate records: the recommended wearer range for each size, and the usable adjustment range measured using the manufacturer’s stated method. A loose strap’s total length is not a chest-size range. Neither is the circumference of an empty vest automatically the wearer’s measurement.
Record the sample size and clothing used. If measurements are supplied, request named reference points and the permitted minimum and maximum settings. Do not invent a universal overlap or minimum strap tail: the attachment and adjustment design determine what is acceptable.
Where do the loose strap ends go?
After adjustment, look for keepers or another specified way to secure the ends. NRS recommends tucking away excess webbing; Palm lists elastic strap keepers on the Solo Vest. Check the intended model rather than assuming every vest has the same solution. [1] [3]

AI-generated illustration. Keeper layouts vary. Follow the manufacturer’s instructions. [1,3] View full size
Also check whether a buckle sits against the seat, arm or edge of another garment. If the chosen model has pockets, adjust it before testing access. A belt crossing a pocket can change how easily it opens; our life jacket pocket guide covers storage separately.
How should you compare two samples?
Use the same intended wearer, clothing and activity for both comparisons, with the correct size in each model. Two products marked “M” are not necessarily equivalent. Treat this as a practical fit review, not a buoyancy or certification test.
For female wearers, compare chest pressure and lower-torso adjustment together. Our life jacket fit guide for women explains what to observe while standing, reaching and sitting in an adult vest.
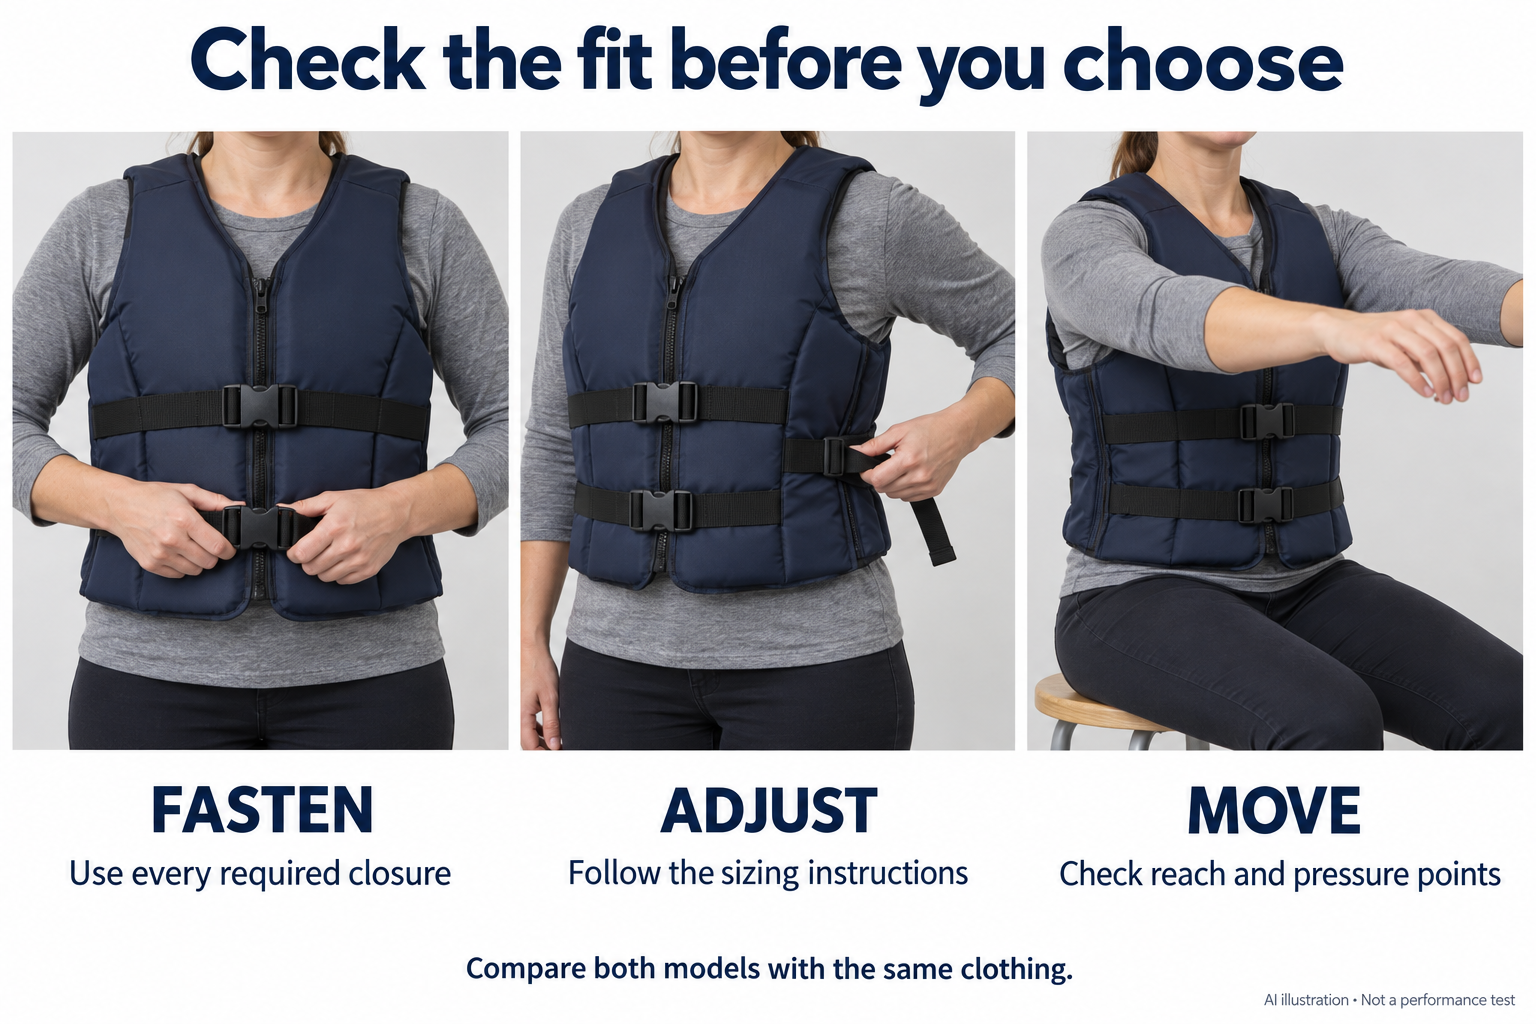
AI-generated illustration. Illustrative dry-land fit checks, not a performance test or evidence of correct fit for a particular wearer. [1,4] View full size
- Fasten. Follow each model’s instructions from the open state. Note any step the wearer cannot complete without help.
- Adjust. Check that the fit is snug and comfortable, the garment stays centred and required hardware is fully engaged.
- Move. Sit in the intended position, reach forward and imitate the activity. Record where edges or hardware press, or where movement is restricted.
- Check retention and access. Perform the fit check specified for that model and confirm access to required controls. RNLI advises checking for ride-up when fitting a buoyancy aid. [4]
RNLI also recommends checking webbing, stitching, zips and buckles for damage or wear. Stop the review if hardware does not close or hold as instructed; ask the supplier to resolve the issue. [4]
For a kayak setup, check the rear panel against the actual seat as well as the closures. Our high-back PFD and kayak seat guide explains how to observe contact while sitting, reaching and turning.
Can I skip a buckle?Follow the complete fastening instructions
A zip and a strap can have different jobs within the same design. Ask the manufacturer which closures are required; do not decide from appearance that one is redundant.
Can I shorten or replace a strap?Ask the manufacturer before altering it
The Life Jacket Association advises against altering life jackets. Do not cut excess webbing or substitute a similar-looking buckle to make a sample fit. Confirm the approved service or replacement route for the exact model. [5]
What should you ask the supplier to confirm?
Keep the decision record short: exact model and size; entry and fastening instructions; wearer range; adjustment method and limits; and the fit issues observed. Compare unresolved issues, rather than awarding points for the number of buckles.
For an INSEAKU order, send those details through our OEM and ODM manufacturing services. The next useful step is a sample and specification review for your users—not choosing a closure solely from its name.
When requesting prices, keep the agreed zipper, buckle and strap specification consistent across offers. Our bulk life jacket price comparison explains how to check quantities, extra costs and delivery terms alongside the unit price.
Sources and further reading
Checked on 7 October 2026. Brand examples explain their own products; their specifications are not assigned to the pictured INSEAKU models.
- NRS — How to Fit a Life Jacket. Sizing, closures, adjustment and excess webbing.
- Palm — Centre Zip PFD. Front zip entry with adjustable strapping.
- Palm — Solo Vest PFD. Side-entry buckles and strap keepers.
- RNLI — Lifejackets and Buoyancy Aids. Fit, ride-up and inspection guidance.
- Life Jacket Association — Caring for Your Life Jacket. Inspection and avoiding unauthorised alterations.