
Work the suit up from your ankles to your hips before pulling it over your shoulders. Seat the crotch, move sleeve material toward your upper arms, then close the entry. To take it off, open the entry fully and peel it down one limb at a time. If your shoulders feel trapped, check the suit’s position before pulling harder.
This guide explains how to put on a wetsuit and take it off, for fabric-lined, one-piece models; the illustrations use a generic back-entry suit. Follow your model’s fastening instructions. Unlined open-cell suits need a different approach: see our open-cell donning guide.
How to put on a wetsuit without yanking it
Remove rings, watches and bracelets. Open the entry fully, including any ankle or wrist zips your model has. Use a clean changing mat and a stable seat for the foot sections. Grip with finger pads, not fingernails; on delicate smooth-skin panels, use the manufacturer’s recommended grip points or the textile lining.[2][4][6]
1. Move material up the legs first
Fold the upper half down toward the waist. Guide one foot through and support the ankle opening as your heel passes. Once the foot is through, work material upward in small sections: ankle to calf, calf to knee, then thigh. Repeat on the other leg. Do not try to lift the whole suit into place by hauling on its waist.[1]
Bring the suit up over your hips until the crotch sits close to your body, without a hanging gap. Redistribute material left bunched around the knees or thighs. Material stranded below your hips can leave too little length available above them.[2]
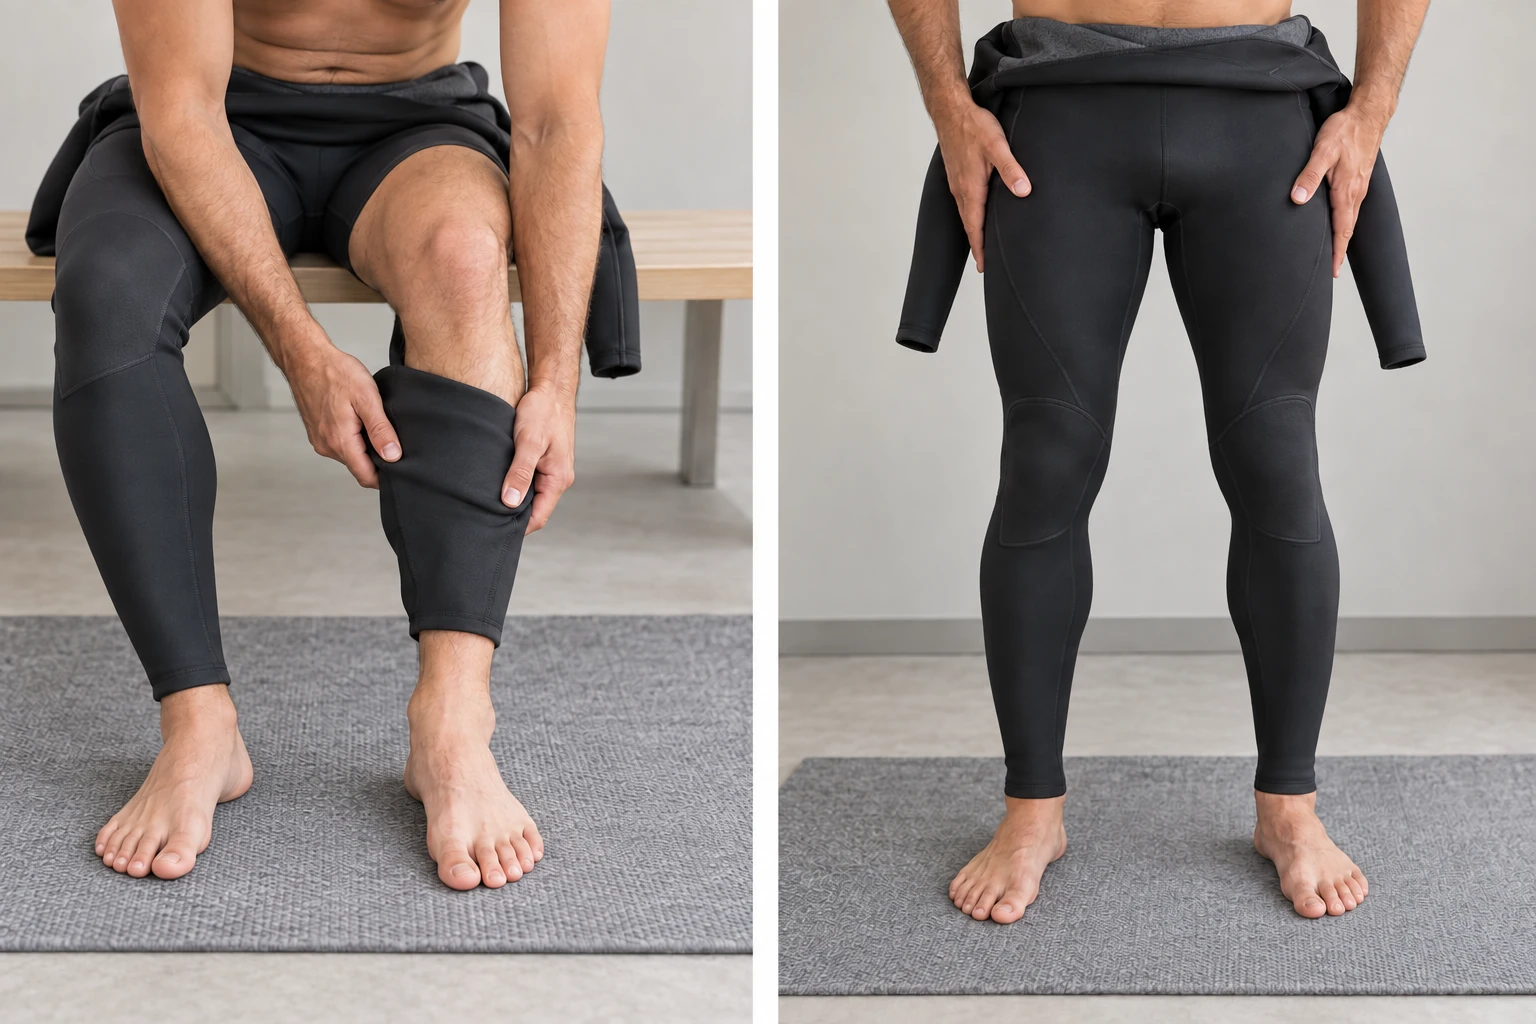
2. Adjust each sleeve before judging the shoulders
Put in one arm, then the other. With your elbow slightly bent, work spare sleeve material from the forearm toward the upper arm. Bring the underarm area into position instead of pulling down on the cuff or lifting the suit by its neck.[3]
A low crotch or sleeves sitting too low can make the shoulders feel tighter than they should. Recheck those areas before deciding the suit is too small. Then reach forward and move your arms through the activity you intend to do. Close-fitting should not mean painful or difficult to breathe in.[1][5]
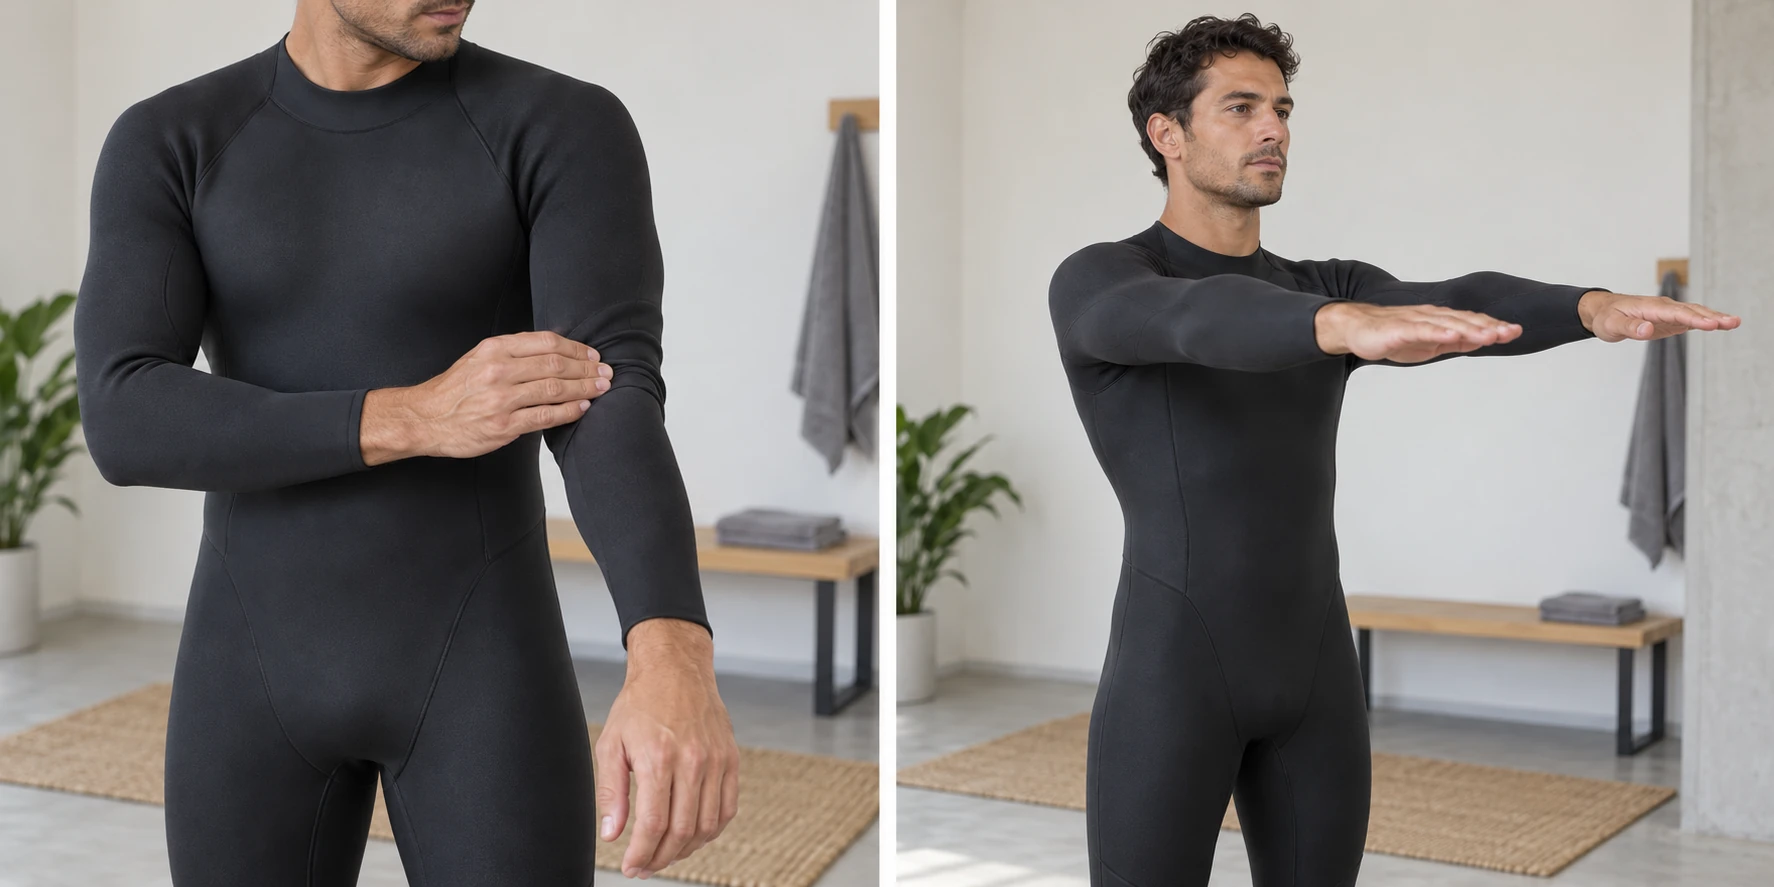
3. Close the entry only after the suit is positioned
Check that the inner flap and anything worn underneath lie flat and clear of the zipper. Use the closing direction specified for your model—back zips do not all work the same way. If the slider stops, stop pulling and check what is obstructing it.[1]
The zipper cord closes the suit; it should not drag the suit into position. If you cannot align the entry comfortably, get help. Some back-zip manuals explicitly require a helper. For an actual jam, use our stuck wetsuit zipper guide.[5]
Wetsuit stuck at the shoulders? Find the cause first.
| What you notice | What to do next |
|---|---|
| Putting it on: crotch hangs low or legs are bunched | Work material up the legs and over the hips, then retry the upper body. |
| Putting it on: sleeve fabric is low or bunched below the elbow | Move it toward the upper arm and seat the underarm area. Do not pull the neck higher. |
| Taking it off: shoulders will not clear the entry | Check that all entry fastenings are released as instructed. Peel one shoulder and arm out at a time; ask for help if needed. |
| Correctly positioned, but breathing or movement is restricted | Stop and take it off. Reassess the size or cut rather than forcing the closure or waiting for it to stretch. |
These are positioning checks, not proof that a particular size fits. For the sizing question, read whether a wetsuit will stretch or shrink.
How to take off a wetsuit without pulling on the cuffs
1. Release the entry, then peel one shoulder free
Release the fastenings and open the zipper fully, in the order your model specifies. For a back-entry suit, gently peel the upper suit down off the shoulders. Bend one elbow and work that sleeve down and inside out, then remove the other arm. Move the sleeve off the arm; do not yank the arm out against a trapped cuff.[5]
2. Roll down to the hips, then work toward the ankles
Peel the torso down inside out. Work the suit over your hips and thighs in short movements, then down past the knees. Keep the material moving rather than pulling from a distant edge.[4]
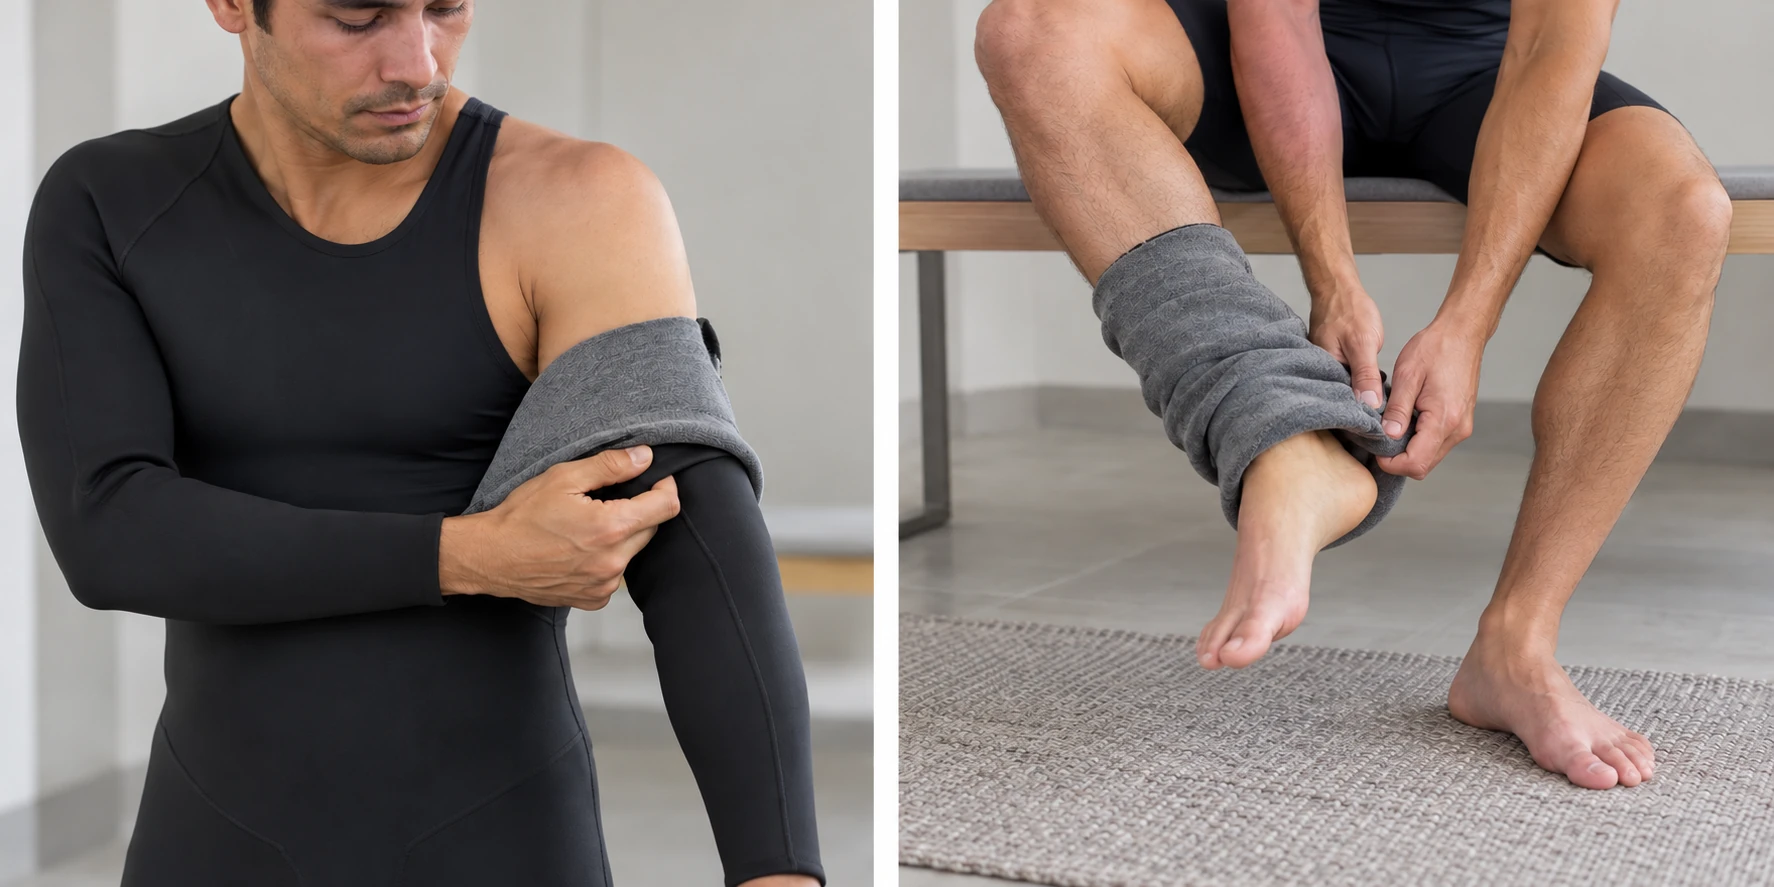
3. Sit down and support the opening around each heel
With the suit down at the ankle, support the opening with your hands while easing the heel and foot through. If it catches, reposition the opening around the heel instead of pulling harder. Never stand on the suit to pull your foot free. That loads the fabric and seams while your foot is still trapped.[4][6]
After changing, follow the suit’s rinse and drying instructions. Our wetsuit cleaning guide covers the next steps.
Can I use a sock or plastic bag to get my foot through?
Does the same sequence work for a chest-zip wetsuit?
The legs and hips still need to be positioned first. The upper-body entry is different: a chest-zip suit may specify which arm enters first and how to lift or remove its shoulder flap. Follow that model’s sequence rather than stretching its neck opening to copy a back-zip method.[4]
Already found a fingernail cut? Our wetsuit tear repair guide explains how to inspect the lining, decide whether a small cut is suitable for DIY repair, and identify damage that needs professional assessment.
Sources
- Blueseventy — Wetsuit Fitting Tips. Incremental fitting, shoulder adjustment and zipper direction.
- Orca — Steps for putting on your wetsuit. Inside-out handling, leg positioning and foot-sliding aids.
- ZONE3 — How do I fit my new wetsuit? Sleeve positioning and careful handling.
- Orca — Tango: putting it on and taking it off. Chest-entry differences, fabric handling and avoiding stepping on the suit.
- SCUBA FORCE — Shadow Wetsuit Manual, printed pages 10–11. Assisted back-zip closure and removal.
- Waterproof — Wetsuit Manual, English donning and doffing sections. Preparation and supported foot removal.
Guidance checked 21 October 2026. Brand-specific instructions remain specific to those products; use your own suit’s manual for its closures and seals.