
Here is how to fix a wetsuit tear: inspect the damaged layers first; a small, clean fingernail cut can often be repaired with a compatible wetsuit adhesive. A surface scuff with no opening may need no glue. For a long or gaping tear, broken seam, zipper-area damage or missing material, contact the manufacturer or a wetsuit repairer first. Judge the location and damaged layers—not just the length.
Can you repair it yourself?
| What you find | Best next step |
|---|---|
| Closed surface mark; no split or lifting edge | Inspect and monitor. Do not add glue just to hide a mark. Check the inside too. |
| Small, clean cut; matching edges; sound surrounding material | A DIY repair may be suitable. Confirm the suit and repair product allow it. An intact lining makes this a simpler job. |
| Gap, missing foam, torn seam, damaged zipper attachment or repeated failure | Ask for a repair assessment. The job may need reinforcement, stitching or panel work rather than edge bonding alone. |
This is a practical triage guide, not a universal size limit. Blueseventy distinguishes small local cuts from long gashes, failed seams and zipper damage.[1]
If the suit is new or might qualify for warranty support, photograph the damage and contact the seller before applying glue. Quiksilver advises checking warranty status first; repair policies differ by brand and region.[2]
Is it a scratch, a cut or a damaged seam?
Lay the suit flat in good light. Look at the outside and the corresponding area inside, without pulling the damage wider. A mark on smoothskin can be cosmetic; an opening with exposed foam is an actual cut. A single outside photograph cannot confirm whether the inner lining is intact.
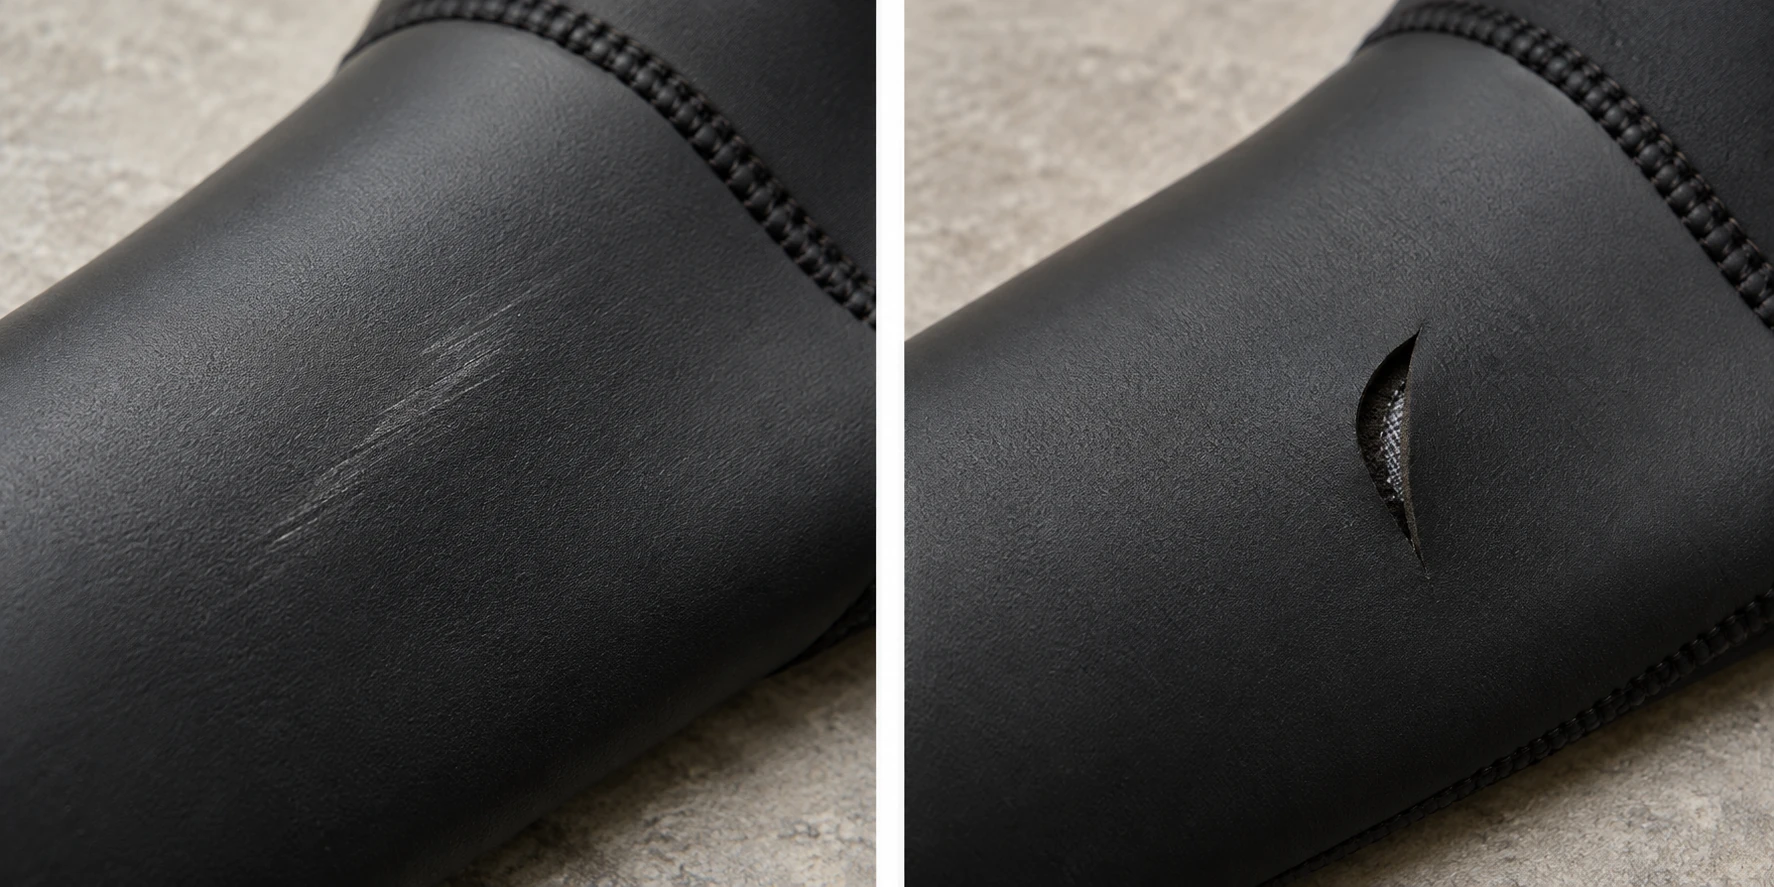
If the jersey lining is cut as well, the damage runs through more than the outer surface. A small through-cut is not automatically beyond repair, but it may need a different repair method or reinforcement. If a panel join has opened or stitches have broken, treat it as seam damage rather than an ordinary fingernail nick.[1][3]

Fabric peeling away from foam across a wider area is another problem. Use our wetsuit delamination guide rather than treating every lifted area as a cut. For slider or teeth problems, see wetsuit zipper troubleshooting.
How to fix a wetsuit tear with matching edges
The method below is for a small local cut with no missing foam and sound material around it, after compatibility and warranty checks. It describes contact-cement edge bonding, not every product sold as “wetsuit glue.”
- Clean and dry the repair area. Remove salt, sand and residue; let the cut dry inside as well as outside. Use only cleaning products permitted by the suit and adhesive instructions. Work in a ventilated area and follow the adhesive’s handling precautions.[2]
- Check that the edges meet naturally. They should line up without stretching the panel or overlapping. If material is missing or a gap remains, ask a repairer which patch or panel repair is appropriate.
- Coat the cut faces as instructed. Use the specified thin coats of compatible neoprene contact cement on the matching faces. Allow the required drying interval before joining them. A thick blob painted across the outside is not the same as bonding the cut edges.[4]
- Align, press and leave undisturbed. Join the edges level, use the instructed pressure and allow the full specified cure. Do not stretch the fresh repair by trying the suit on.[3]
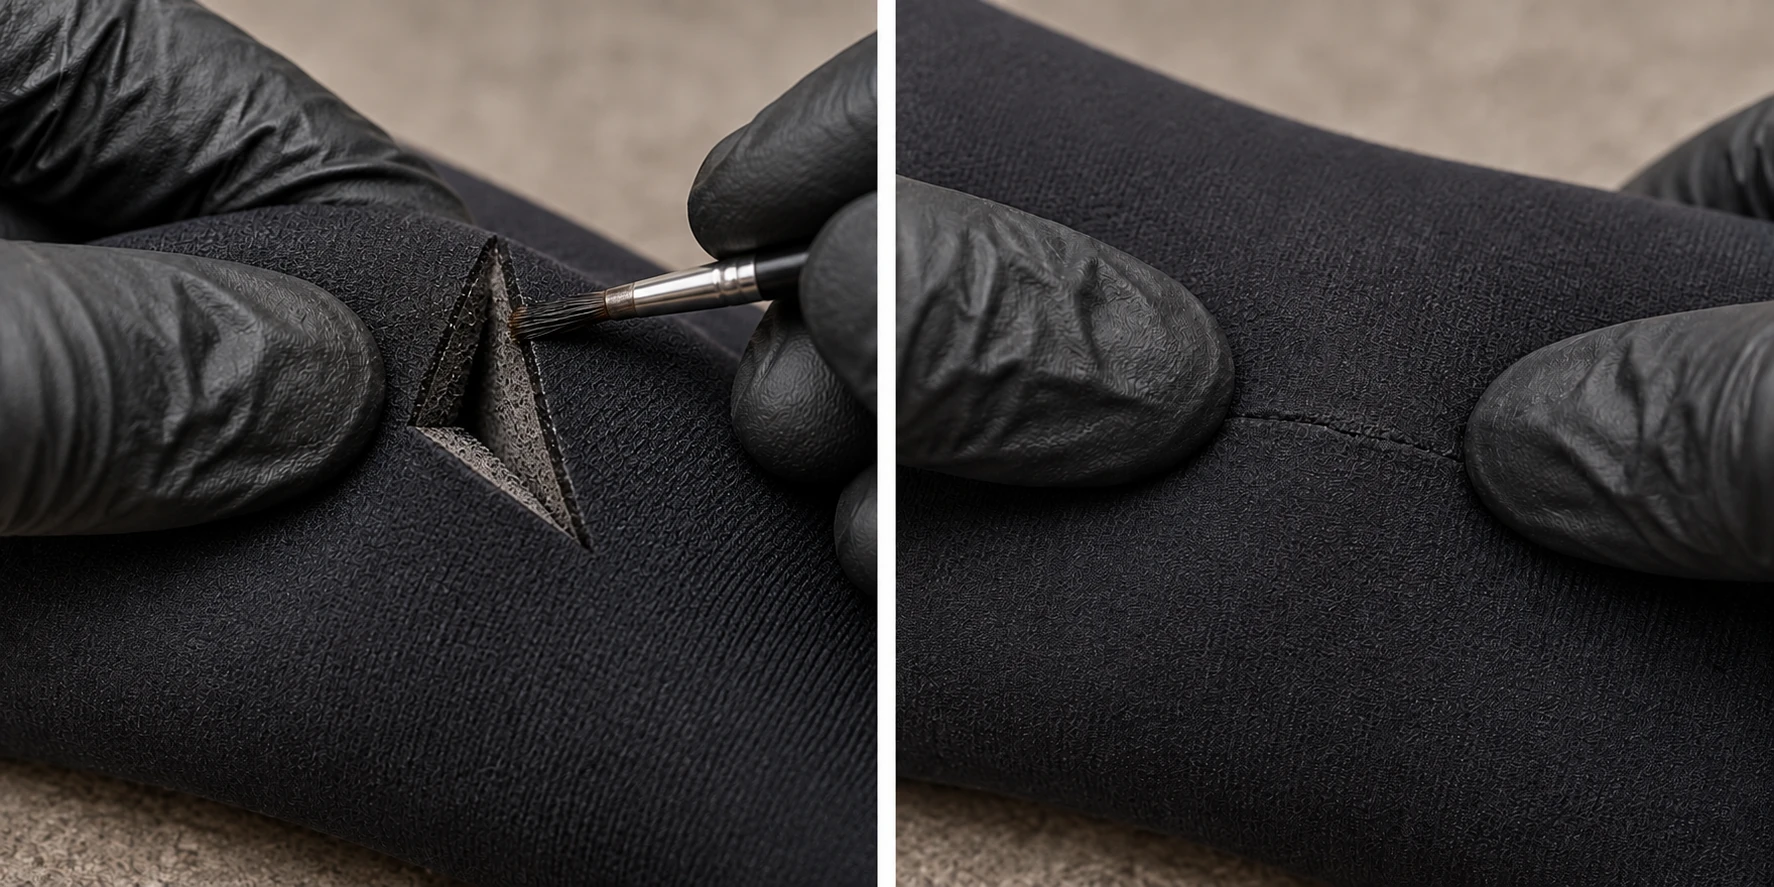
For example, GEAR AID’s current Aquaseal NEO instructions use a first coat with a 5-minute wait, a second coat with a 10-minute wait, then light pressure for 5–10 minutes. Those timings belong to that product; they are not a recipe for other adhesives.[4]
How long before you can wear the suit again?
Use the full cure instructions for the exact product, not “it feels dry.” Two products from the same brand can have very different schedules:
| Repair product | Published cure time and conditions |
|---|---|
| Aquaseal NEO Neoprene contact cement | 20–30 minutes Product application range: 60–80°F. Follow its coat-and-press sequence.[4] |
| Aquaseal FD Urethane repair adhesive | 8–12 hours Without accelerator; application range 60–100°F, above 40% relative humidity.[5] |
These are product specifications, not INSEAKU test results or a performance ranking. Preparation takes additional time. Follow the instructions supplied with your product if they differ.
After the specified cure, inspect both sides and gently flex the area. If the edges reopen, the lining lifts or the repair feels incomplete, stop and get advice. Do not hide a failed repair under repeated layers of glue. A neat-looking repair is not proof of restored strength or insulation.[1]
When should you send it for repair?
Contact the manufacturer or a specialist for long tears, open seams, zipper attachments, missing material or a repair that keeps reopening. Also ask first when damage sits in a heavily stretched area, the surrounding foam is deteriorating, or you cannot identify the coating or lining. These are reasons to obtain an assessment, not automatic reasons to discard the suit.
Send an overall photo showing the location, close-ups of both sides, the model and purchase details, and whether glue has already been used. Ask whether the job needs bonding, reinforcement or panel replacement, and request the cost and turnaround before shipping. Rip Curl’s support process, for example, starts with an image and a description when coverage is uncertain.[6]
Can I use superglue, ordinary tape or a household iron?
Do not substitute a household product simply because it sticks. Choose a repair system explicitly suitable for the suit’s material and finish. Heat-activated neoprene patches are real repair products, but their instructions specify how heat is applied; they do not give permission to iron any wetsuit coating. If compatibility is unclear, ask the manufacturer first.[3]
If the material around the tear is also deteriorating, use our wetsuit lifespan guide to decide whether a repair is worthwhile.
Sources
- Blueseventy — How do I repair a small tear in my swimming wetsuit? Small-cut assessment, referral cases and post-cure checks.
- Quiksilver — The Definitive Wetsuit Repair Guide. Warranty-first approach, clean/dry preparation and ventilation.
- GEAR AID — How to Repair a Wetsuit. Different repair systems and reinforcement options.
- GEAR AID — Aquaseal NEO Contact Cement. Product-specific application sequence and cure specifications.
- GEAR AID — Aquaseal FD Repair Adhesive. Product-specific cure time and application conditions.
- Rip Curl — Warranty & Care. Example of a manufacturer’s assessment route; not a warranty promise for other brands.
Sources checked 21 October 2026. Product instructions and local repair policies can change. This guide concerns neoprene wetsuits, not drysuit seals or lifejackets.